
Most product configurator projects start with a very normal client message:
“Here are the models.”
Then you open the folder and see STL files.
That is not a bad thing. STL is common in production and manufacturing workflows. It is simple, reliable, and many teams already use it for 3D printing, CNC, CAD previews, or internal product work.
The problem starts when you want to put that same file inside a website.
A manufacturing model and a web model are prepared for different realities.
The manufacturing file cares about shape. The web version also needs scale, materials, UVs, clean geometry, texture size, compression, loading time, and mobile performance.
That gap is where a lot of 3D web projects become slow.
This is the pipeline I usually use when I receive STL or CAD-style files from a client and need to turn them into something that works inside Three.js, React Three Fiber, or any WebGL-based experience.
What STL gives you
An STL file is basically a triangle surface.
That is the fun fact behind it too. STL comes from stereolithography, one of the early 3D printing workflows. It was built for describing surface geometry, not for building nice web assets with materials and optimized textures.
So when you import an STL, do not expect a finished asset.
Usually you get:
- geometry
- no real material setup
- no UVs
- uncertain scale
- too many triangles in places that do not need them
- separated triangle data
- flat or broken normals
- large file size
For manufacturing, that can be fine.
For a browser, it needs work.
Importing into Blender
Open Blender and keep the first step clean.
Go to:
File > Import > STL
Pick the file and import it.
After import, do not start texturing immediately. First check scale, orientation, and geometry.
In Blender, open the right sidebar with N.
Go to the Item tab and check Dimensions.
If the product is supposed to be 180 cm long and Blender says it is 180 meters, fix that now.
For unit setup, go to:
Scene Properties > Units
Set Unit System to Metric if you work with real product dimensions.
STL files often come from millimeter-based workflows, so large scale problems are very common. A chair can import as a building. A small object can import almost invisible. It happens all the time.
Once the scale looks correct, apply it:
- Object Mode
- select the object
- press
Ctrl + A - choose Apply > Scale
If rotation is also adjusted, use:
Ctrl + A > Apply > Rotation & Scale
This locks the transform into the object data, so later export and compression behave in a more predictable way.
Keep the source model
Before editing anything, duplicate the imported model.
Select the object and press:
Shift + D
Then right click to keep it in the same place.
Move the duplicate into a collection called something like:
_SOURCE_STL
Hide that collection.
This sounds boring, but it saves time later. If something breaks during cleanup, or the client sends a small correction and you need to check the original shape, you still have the untouched version inside the Blender file.
I usually work on a duplicate and keep the first import untouched.
Merge vertices
STL can be messy because the file is often saved as separate triangles. You may see a very high vertex count even when the object looks simple.
To clean this:
- select the working model
- press
Tabto enter Edit Mode - press
Ato select everything - go to Mesh > Clean Up > Merge by Distance
After clicking it, look at the bottom-left operator panel. You can adjust Merge Distance there.
Start small.
Something like 0.0001 or 0.001 depending on your scale.
If the value is too high, small details can collapse. If the value is too low, nothing useful happens.
You can also press F9 right after the operation to reopen the last operator settings.
This step often cuts a lot of hidden waste from the mesh because duplicate vertices get welded together.
Check normals
Normals control which way the surface points.
When normals are wrong, the model can look fine from one angle and broken from another. Lighting can turn weird, faces can look black, and materials can react in a way that feels impossible to fix.
In Blender, turn on Face Orientation:
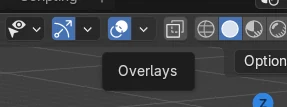
- top-right of the viewport
- click the Overlays icon
- enable Face Orientation
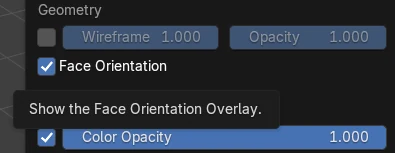
Blue means the face points outward. Red means the back side is visible.
If the object is mostly red from outside, fix it.
Go to Edit Mode:
- press
A - press
Shift + N
That recalculates normals outside.
You can also use:
Mesh > Normals > Recalculate Outside
If only a few faces are still wrong, select those faces and use:
Alt + N > Flip
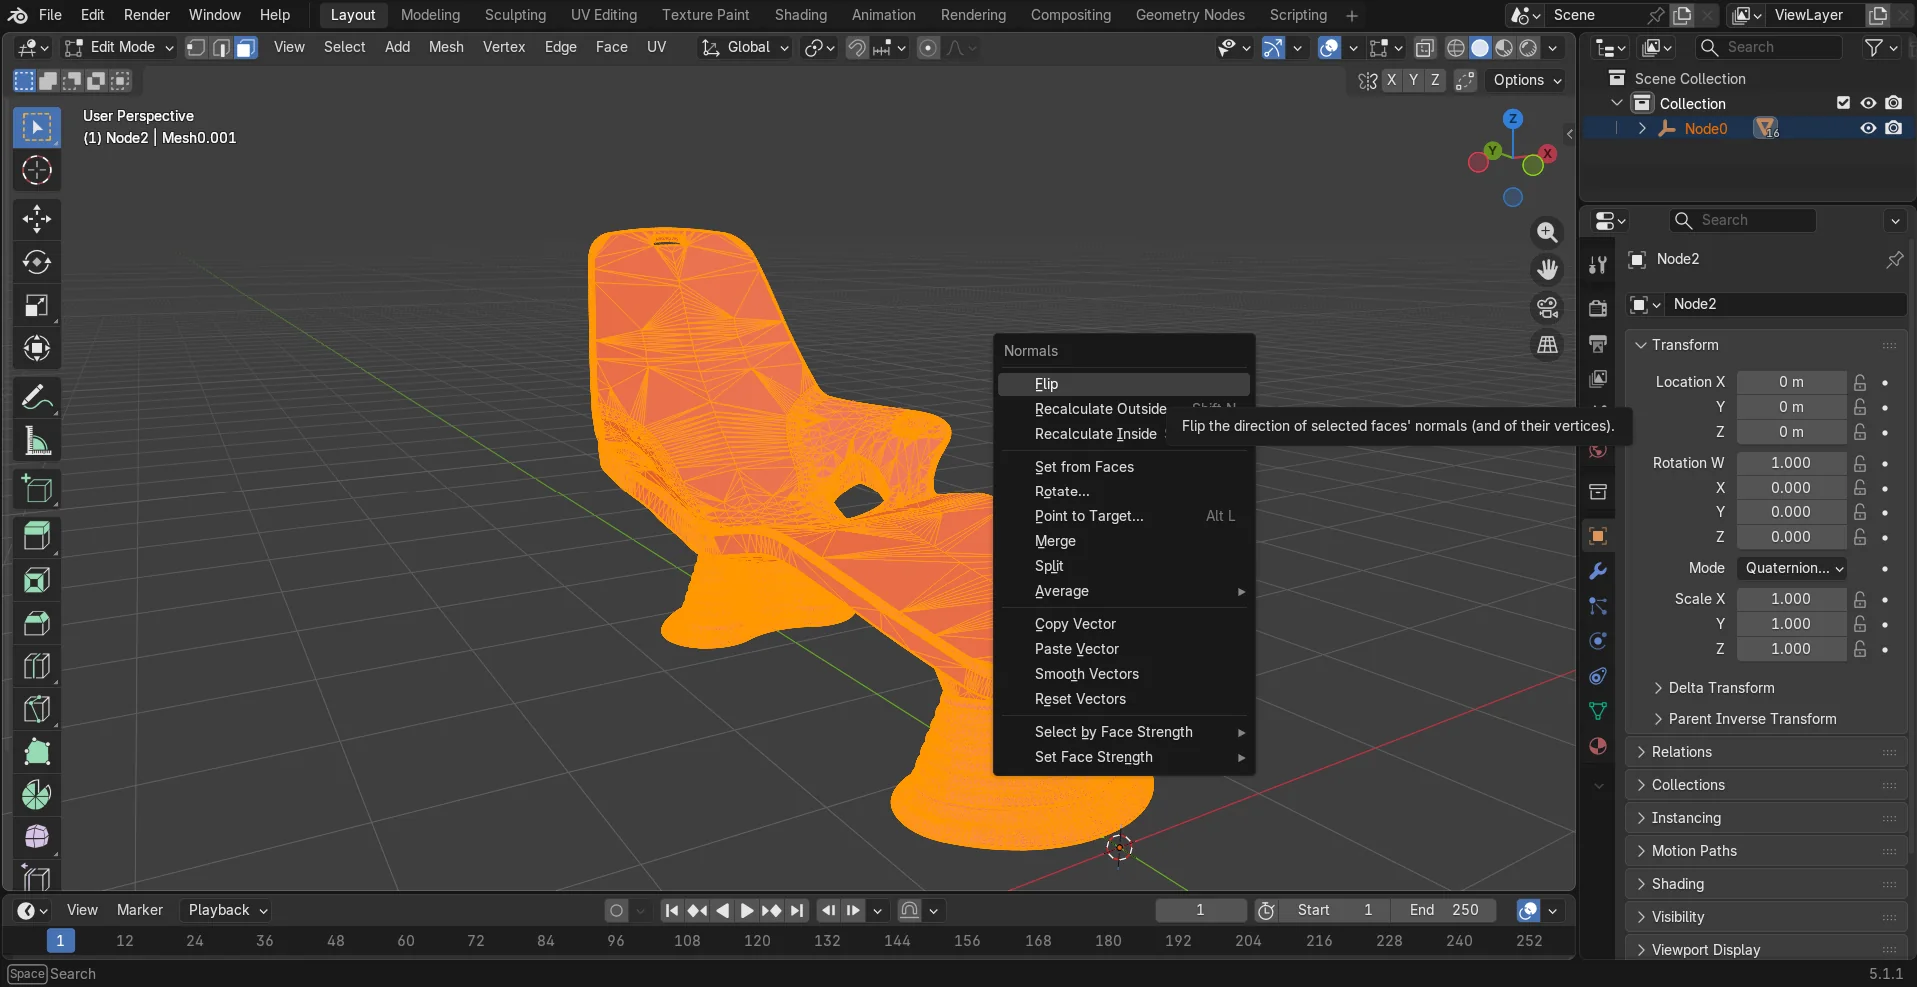
Do this before material work. Wrong normals can make you waste time adjusting materials that are actually fine.
Clean loose geometry
Sometimes CAD exports include tiny floating pieces, hidden internal faces, or small leftover surfaces.
A quick way to check:
- Edit Mode
- press
A - go to Mesh > Clean Up
Useful options here:
- Delete Loose
- Degenerate Dissolve
- Merge by Distance
You can also use Select > Select All by Trait > Loose Geometry.
Then delete those parts if they are not needed.
Be careful with product models though. Small details can be real details. Screws, caps, stitches, holes, or small supports may look like garbage at first glance.
Zoom in before deleting.
Decimate with your eyes, not only numbers
After scale, merging, and normals, the next big step is polygon reduction.
Select the object and go to:
Modifiers tab > Add Modifier > Decimate
For curved product models, I usually start with Collapse mode.
Try a Ratio around:
- 0.5
- 0.35
- 0.2
Apply only when you like the result.
Watch the silhouette while you change the ratio. Rotate around the product and check the edges that people will actually notice.
If a flat bottom has thousands of triangles, reduce it aggressively.
If a curved edge defines the product shape, keep more geometry there.
For CAD-like flat areas, you can also test:
- Edit Mode
- select faces
- Mesh > Clean Up > Limited Dissolve
Limited Dissolve can remove extra edges from flat or near-flat areas while keeping the broader shape readable.
Use it carefully and check the result right away.
A useful habit:
turn on statistics in the viewport.
Top-right Overlays menu > Statistics
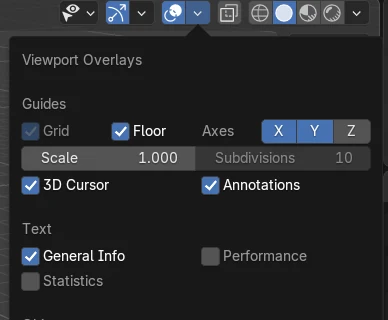
Now you can see vertices, edges, faces, and triangles while cleaning.
This gives you feedback without exporting every few minutes.
Shading and weighted normals
After decimation, the surface can start looking faceted.
Try this:
- Object Mode
- right click the model
- Shade Smooth
If the object becomes too soft or strange, add a Weighted Normal modifier:
Modifiers tab > Add Modifier > Weighted Normal
Weighted normals help many product models look clean without adding more geometry.
This is especially useful on furniture, plastic products, hard-surface objects, and CAD-style shapes where you want broad surfaces to feel smooth while edges still read clearly.
For some objects, you may also need to mark sharp edges manually:
- Edit Mode
- select edges
Ctrl + E- Mark Sharp
Then use Auto Smooth or the smooth-by-angle workflow available in your Blender version.
Different Blender versions moved some normal controls around, so if you do not see the exact same panel, search for “Smooth by Angle” in the modifier or object shading options.
UVs from nothing
STL has no UVs.
So if the product needs textures, you need to unwrap it.
For a quick first pass:
- go to the UV Editing workspace
- select the model
- enter Edit Mode with
Tab - press
A - press
U - choose Smart UV Project
This gives you an automatic unwrap.
It is not always beautiful, but it gives you a starting point.
After that, open the UV Editor and check the islands.
Use:
UV > Pack Islands
If the texture direction is important, automatic unwrapping may not be enough.
For example, if a chair has a stripe pattern, woven texture, wood grain, or layered manufacturing lines, the UV direction becomes very visible.
In those cases, add seams yourself:
- Edit Mode
- select edge loops where the unwrap should cut
- press
Ctrl + E - Mark Seam
- press
A - press
U - Unwrap
One small trick: add a checker texture while testing UVs.
A checker texture quickly shows stretched areas. If the squares become long rectangles, the UV is stretched there.
This is much easier to diagnose before you start using final product textures.
Texel density
Texel density is basically how much texture resolution each part of the model gets.
If one product part has huge UV islands and another part has tiny islands, the texture can look sharp in one place and blurry in another.
In a product configurator, users switch products and look at details, so uneven texture sharpness becomes visible.
In Blender, you can inspect this visually with the checker texture.
For a more controlled workflow, use a texel density add-on. There are free Blender add-ons for this, and they help keep the same texture scale across a product series.
Even without an add-on, you can still do a simple check:
- apply the same checker material to all products
- switch between models
- look for scale changes in the checker pattern
- resize UV islands if one product looks much sharper or blurrier
This is one of those small details that make a catalog feel consistent.
Rebuilding materials
STL does not carry a nice PBR material setup.
So you rebuild materials inside Blender.
Go to the Shading workspace.
Create a new material and use the Principled BSDF shader.
For a basic PBR material, focus on:
- Base Color
- Roughness
- Metallic
- Normal Map if needed
- Alpha only if transparency is required
Try to keep material count low.
Every separate material can create more rendering work in a real-time scene. For a product configurator, this becomes important when users switch products, colors, or variants.
If a product has five finishes, do not create five different mesh exports if you can drive the finish from material data.
For example:
- same geometry
- different color texture
- different roughness value
- different normal map if needed
That keeps the configurator easier to extend.
If you work from reference photos, keep them visible.
I usually put product photos on a second screen and adjust the material under similar lighting. The scene in Blender does not need to be perfect, but it should give a useful material preview before export.
Texture size
Textures can make a model heavy very fast.
A small product on a phone screen does not need a 4K texture in most cases.
Common sizes:
- 512 for small details
- 1024 for most product surfaces
- 2048 for hero closeups
- 4096 only when there is a real close-view reason
Use power-of-two sizes when possible:
- 512
- 1024
- 2048
Modern engines can handle other sizes, but power-of-two textures still make life easier in many workflows, especially with mipmaps and compression.
For web use, export or convert textures to WebP, AVIF, or KTX2 depending on the project.
WebP is easy and widely used.
KTX2 is very useful for GPU texture compression, especially on mobile. Download size is only part of the story. GPU memory can become the real limit in a 3D scene.
Exporting GLB from Blender
Once the model is cleaned, unwrapped, and materials are ready, export it.
Select the final object or collection.
Go to:
File > Export > glTF 2.0
In the export panel, use:
- Format: glTF Binary (.glb)
- Include: Selected Objects if you only want selected assets
- Transform: keep default unless your project needs a specific axis setup
- Geometry: apply modifiers if the stack should be exported
- Materials: Export
- Images: Automatic or your chosen texture workflow
I usually export .glb because it keeps the model, materials, and textures in one file.
That makes loading easier in Three.js.
After export, do not assume it is ready.
Open the GLB in a neutral viewer.
Good options:
- gltf.report
- Three.js editor
- Babylon Sandbox
- your actual project scene
Check:
- scale
- rotation
- materials
- texture direction
- normals
- transparency
- file size
- mobile loading
- console warnings
If it looks wrong in the viewer, fix it in Blender before putting it into the app.
Compression
After export, run an optimization pass.
You can use glTF-Transform, gltfpack, or another glTF optimization tool.
A typical optimization step can:
- remove unused data
- deduplicate accessors
- compress geometry
- resize textures
- convert textures
- prune empty nodes
- reorder mesh data for faster loading
For many product models, geometry compression creates a major size drop because CAD exports can contain dense triangle data.
Draco is common for strong geometry compression.
Meshopt is also common and is known for fast decoding.
For product configurators, I usually test both and check file size plus loading behavior in the actual page.
Do not optimize once and forget it.
Open the optimized file again and test it.
Some compression settings can affect morph targets, animations, or special geometry cases. Static product models are usually easier, animated models need more careful testing.
A simple pipeline I like
This is the full pipeline in the order I prefer:
- Import STL into Blender
- check scale and dimensions
- apply scale and rotation
- duplicate and hide the original import
- merge vertices by distance
- check face orientation
- recalculate or flip normals
- delete loose geometry
- decimate carefully
- shade smooth
- add weighted normals if needed
- unwrap UVs
- test UVs with a checker texture
- rebuild PBR materials
- resize and compress textures
- export GLB
- run optimization and compression
- open the final file in a neutral viewer
- test inside the real WebGL scene
- test on a real phone
The order is important because some steps create work for the next step.
If you texture before fixing geometry, you may redo the UVs.
If you optimize before final materials, you may export again.
If you test only on desktop, you may find the painful issues too late.
Common problems
Scale is wrong
Check dimensions with N > Item. If it is off, scale the object and apply transform with Ctrl + A.
Model is black or lighting looks broken
Turn on Face Orientation. Red outside usually means flipped normals. Use Shift + N in Edit Mode.
Model looks faceted
Try Shade Smooth and add a Weighted Normal modifier. Also check if decimation damaged curved areas.
Texture looks stretched
Open UV Editing and apply a checker texture. Rework seams or unwrap again.
GLB is still too large
Check texture sizes first. Then check triangle count. Then run compression.
Browser shows washed out colors
Check color space and tone mapping in your Three.js scene. Also check if textures are loaded as color maps or data maps correctly.
Product catalog feels inconsistent
Check UV scale, texture scale, model scale, camera distance, and material roughness across products.
Small Blender shortcuts
These are the shortcuts I use a lot during this process:
Nopens the right sidebarTabswitches Edit ModeAselects allCtrl + Aapplies transforms in Object ModeShift + DduplicatesShift + Nrecalculates normals outside in Edit ModeAlt + Nopens normal toolsUopens unwrap options in Edit ModeCtrl + Eopens edge toolsF9reopens last operator settings/isolates selected object in the viewportHomeframes the scene
Learn these and Blender cleanup becomes much faster.
Final thought
A client can send you a folder full of 3D files and it can feel like the asset part is already done.
Usually, it is only the start.
For web projects, the asset becomes ready when it loads fast, has clean normals, has usable UVs, uses lightweight textures, keeps the product shape, and behaves well inside the real browser experience.
STL gives you the surface.
glTF gives you a format the web can actually use.
The work in the middle is where the asset becomes practical.